![]()
Learn more about our scanners at: https://joescan.com![]()
The Calibration Editor is used to calibrate the scanner's position and angle.
Whenever a scanner is replaced or physically moved, it will need to be recalibrated. We recommend that you periodically perform a calibration on all the scanners in a system to ensure that they are providing highly accurate measurements. The calibration schedule will depend upon the level of accuracy required, the amount of vibration the scanners are subjected to, and the stability of the frame. Calibration schedules can vary from daily to quarterly depending on your needs. Work with your system integrator to determine the calibration schedule that's right for your system.
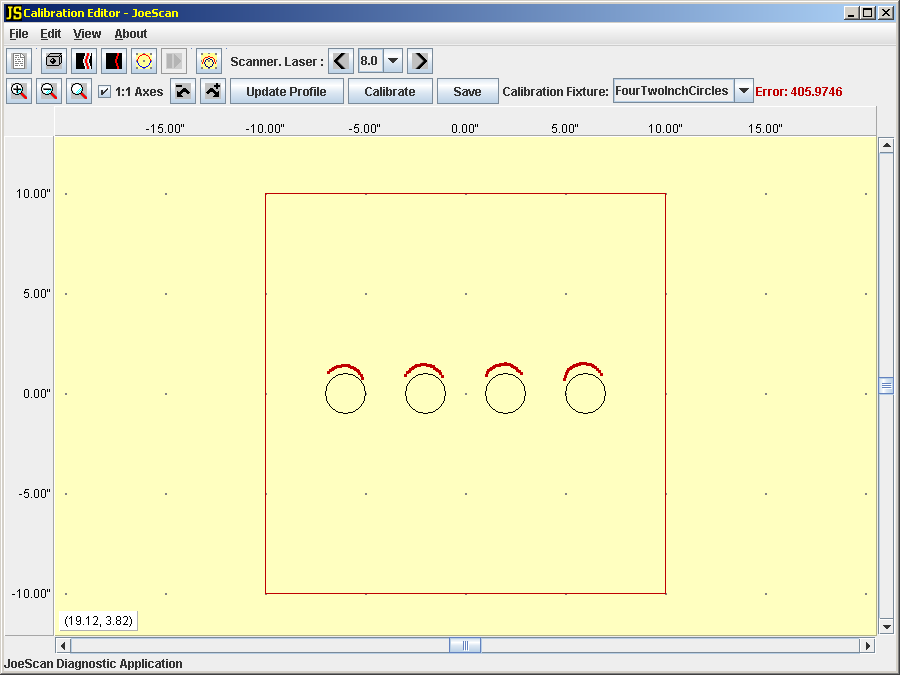
Your calibration fixture almost certainly doesn't look like the fixture in our example below. Read the separate Calibration Parameter documentation to enter parameters to define your calibration fixture in the Parameter Editor.
Calibration Procedure
Switch to the Calibration Editor by pressing F7 or clicking the icon.
Use the Scanner drop-down box to select which connected scanner to calibrate. If the selected scanner has more than one laser, use the Laser drop-down box to select which laser to examine.
Click the button if there is no profile data or if the calibration fixture moved. In order to see the profile data, you may have to zoom out quite a bit.
Make sure the appropriate calibration fixture is selected from the drop-down box. You can create new calibration fixtures in the Parameter Editor.
Drag and rotate the profile points to fit closely to the calibration fixture. Drag the profile by left-dragging, and rotate it by right-dragging. The fit doesn't have to be exact.
Tip: It's easiest to drag the profile to one feature and then use that feature as the center of rotation.
Tip: When rotating, moving the mouse farther away from the center of rotation will make fine-grained rotation easier.
Click the button repeatedly until the Error doesn't get noticeably better. JSDiag will automatically fine-tune the calibration to achieve the best fit.
Tip: "Nudging" the rotation can help JSDiag get a better calibration.
Repeat steps 2-6 for each scanner and laser in the system.
Table 1. Toolbar Buttons
| Button | Function | Hot Key |
|---|---|---|
| Zoom In | Ctrl++ | |
| Zoom Out | Ctrl+- | |
| Zoom to Fit | Z | |
| 1:1 Axes | A | |
| Rotate Left | - | |
| Rotate Right | = or + | |
| Update Profile | U | |
| Calibrate | Enter | |
| Save | Ctrl+S |
