![]()
Learn more about our scanners at: https://joescan.com![]()
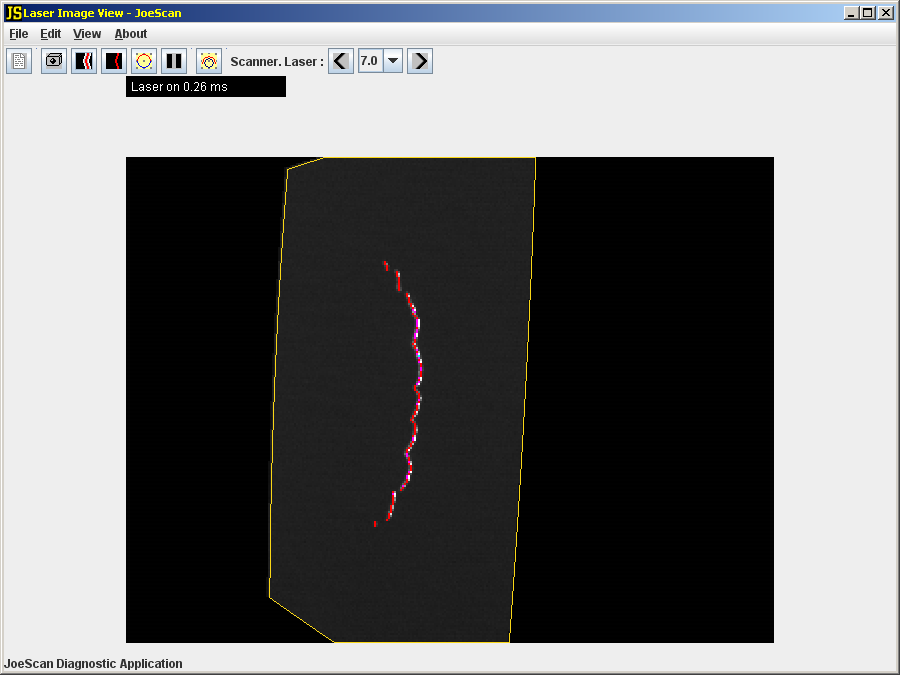
Laser Image View shows where the scanner is finding the laser in the camera's view. It paints the colored laser line onto a black-and-white image of the actual camera image that is being used to find the laser. This view is useful for finding stray light sources that are contributing false data points or places where the camera's view of the laser is obstructed by some object.
The laser exposure time is displayed in the upper-left corner of the display.
Use the Scanner.Laser drop-down box to select which connected scanner to examine. If the selected scanner has more than one laser, select the corresponding laser number to select which laser to examine. Laser 0 is the laser farthest from the camera.
The yellow outline is the area that is contained within the scanner's Scan Window. Only data within the scan window is analyzed to adjust the exposure time when actively scanning.
Sample Image
